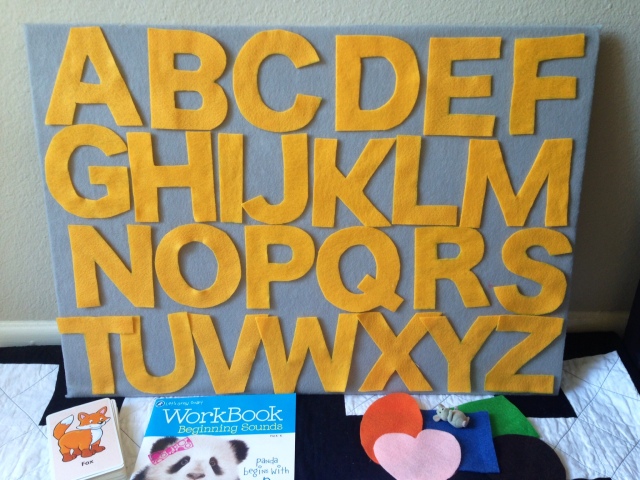
Liv loves letters and numbers, but especially letters! She frequently points to a word and says, “what’s this?”, so I thought it was time to give her something to play with and encourage a love she already has. I’m all about creating a learning lifestyle and this felt board has definitely been tried, tested and passed the test with flying colors. Liv is a new 2, so it could very easily keep a younger child busy (especially the shapes) or be used for preschoolers or even kindergarteners who are learning to read and spell simple words. Recently Liv learned how to spell “fox” – “F-O-X!” It was a personal victory for me, but mostly because of my love for You’ve Got Mail. Goodness, I love me some Tom Hanks & Meg Ryan. Perfect chemistry! Yuck, chemistry. There’s no chemistry involved in this felt board!

The Modern Locket // Easy DIY Felt Board with a Free Template // Great for moms, preschool teachers and kindergarten teachers!
The felt board is pretty cheap to make and super easy! If you can trace & cut, then you can make it. And, bonus!, this felt board is a crowd pleaser! Kids seem to flock to it and stay entertained for quite a while! I didn’t make this with the intention of putting it up on the blog, but it has been so great that I wanted to share! I think it would be great for moms, preschool/kindergarten teachers and homeschoolers alike!
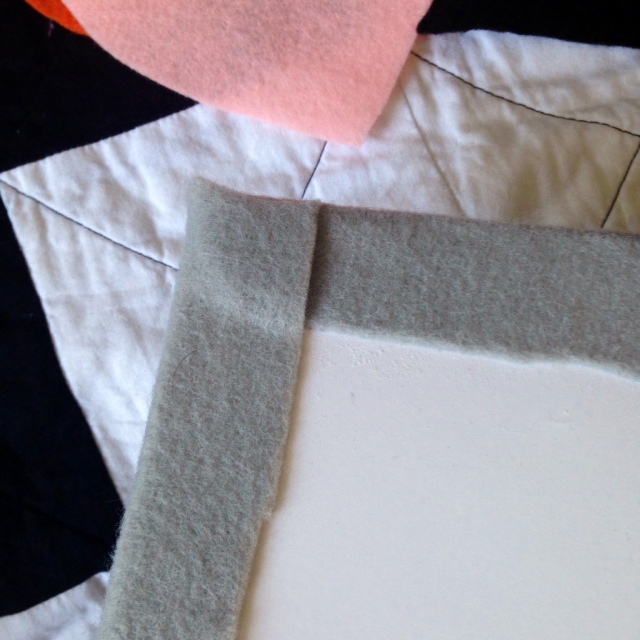
What you’ll need:
1 standard foam core poster board (I got mine at Target)
1 yard of felt for the background
12 9×12 craft felt sheets for the letters
5 9×12 craft felt sheets for the numbers
a few extra felt sheets or scraps in various colors for the shapes
scissors
spray adhesive
water soluble fabric marking pen
Optional: Command Damage-Free Hanging Strips
This FREE TEMPLATE for your letters, numbers, and basic shapes.
Directions for the Board:
Step 1 – Lay your yard of background felt on the floor with your foam core board on top of it. Cut the felt around the board giving it about 2 inches extra so you can fold it over the back of the board easily.
Step 2 – In a well-ventilated area, give your board a good spray with the adhesive, then gently and evenly lay the board adhesive side down on your felt. Carefully turn it over press to remove wrinkles and ensure a good stick. I gave mine a little time to dry before I folded the edges over the back, but you certainly don’t have to.
Step 3 – Cut some slits in the 4 corners of your felt and give a good spray of adhesive along the short sides and fold in your edges – give it a good press! I found that waiting just a minute after I sprayed to fold in my sides allowed the adhesive to get a little tackier and hold the felt down better. Next, do the same to the top and bottom sides. Let it rest in a safe-from-kids area to fully adhere. Hip! Hip! You have created your felt board!!
Directions for the Template:
Step 1 – Print and cut out every letter, number and shape. I spaced all this work out for a week during nap time. Mama’s got to watch her stories & craft it up sometimes! (Plus, it’s for the education of our children…no guilt there!)
Step 2 – Using your fabric marking pen, trace your letters, numbers and shapes on the felt colors you’ve chosen for each. I found that with the letters and numbers, you can fit 2 of each on each sheet of felt. I actually used felt scraps for my shapes and used a different color for each in order to reinforce color recognition.
Step 3 – Cut those suckers out!! If you’re a perfectionist, but also not so much of a perfectionist that you cut perfectly inside the lines, then you can use a damp cloth to blot away the lines that may still remain from tracing.
Optional Hanging:
I used the Command Strips on the back corners of my board to hang it at toddler height in Liv’s room, but, the great thing about the picture hanging strips is that I can remove it from the wall and set it in a family area so she can feel like she’s part of the crew.
You’re done! Now, get to experiencing the wonder and magic of felt sticking to felt!
A couple side-notes…The template only has upper case letters. So far, I haven’t had the time to put that junk together. When I do, I’ll update it and make a note here. I’m also working on a weather kit that will allow us to explore the weather of the day and add it to the board. Think: sun, clouds, little swirly things that indicate wind, angry storm clouds, rain drops, etc. I’ll probably created a supplementary post for that and link to it here when I get around to it.
I plan on getting a few pre-made sets of felt characters to encourage imagination play and story-telling. Amazon has lots!
Any questions? Great! Ask away…

